Introduction
IrisAgent AI can answer customer queries right within your Freshchat conversations seamlessly using webhooks. This guide will help you integrate IrisAgent with Freshchat.
IrisAgent Portal Configuration
Step 1: Access Freshchat Configuration
- In the IrisAgent portal, open Deploy > Chat from the left sidebar
- Find the Freshchat card and click Configure to open the configuration sidebar
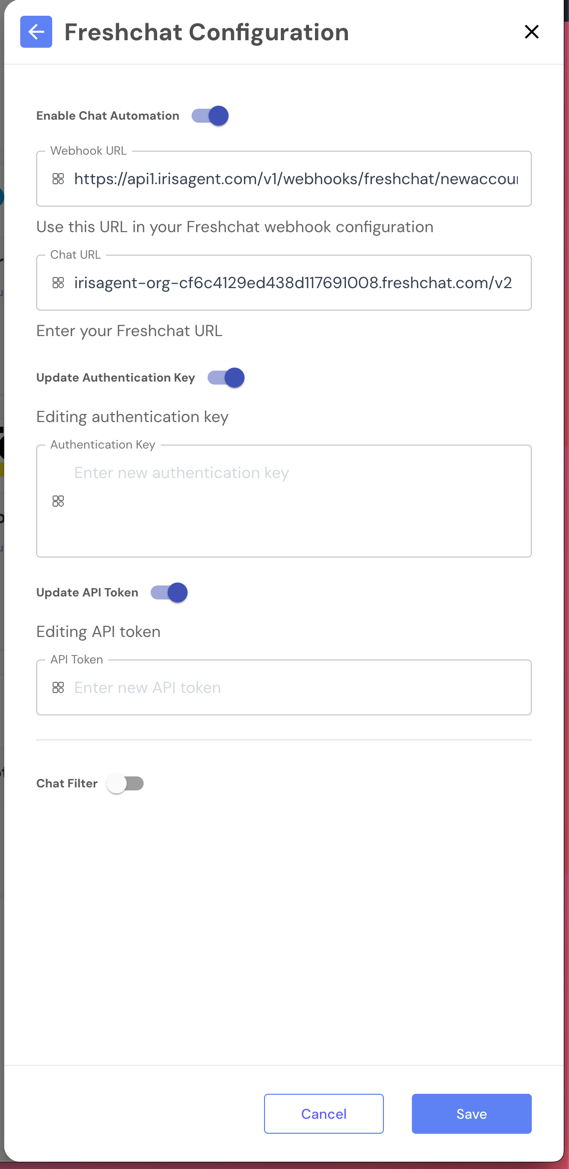
- Toggle Enable Chat Automation to ON

Step 2: Note Your Webhook URL
Once enabled, you’ll see a Webhook URL field that displays your organization-specific endpoint:
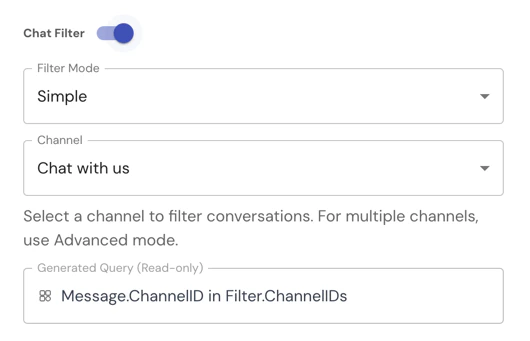
Step 2a: Configure Event Filtering (Optional)
You can optionally enable event filtering to control which Freshchat conversations IrisAgent processes. This allows you to target specific channels or apply custom filtering logic.
Filter Modes
Simple Mode:- Toggle Enable Filter to ON
- Select Simple mode
- Choose a Topic (Channel) from the dropdown
- IrisAgent will only process conversations from the selected channel
- Toggle Enable Filter to ON
- Select Advanced mode
- Enter a custom filter query
- IrisAgent will process only conversations matching your query criteria
Freshchat Admin Settings
Step 3: Access Freshchat Admin Settings
- Log in to your Freshchat account
- Navigate to:
https://{YourOrganizationID}.myfreshworks.com/crm/sales/settings - You’ll be configuring two sections:
- Conversation Webhooks
- API Settings
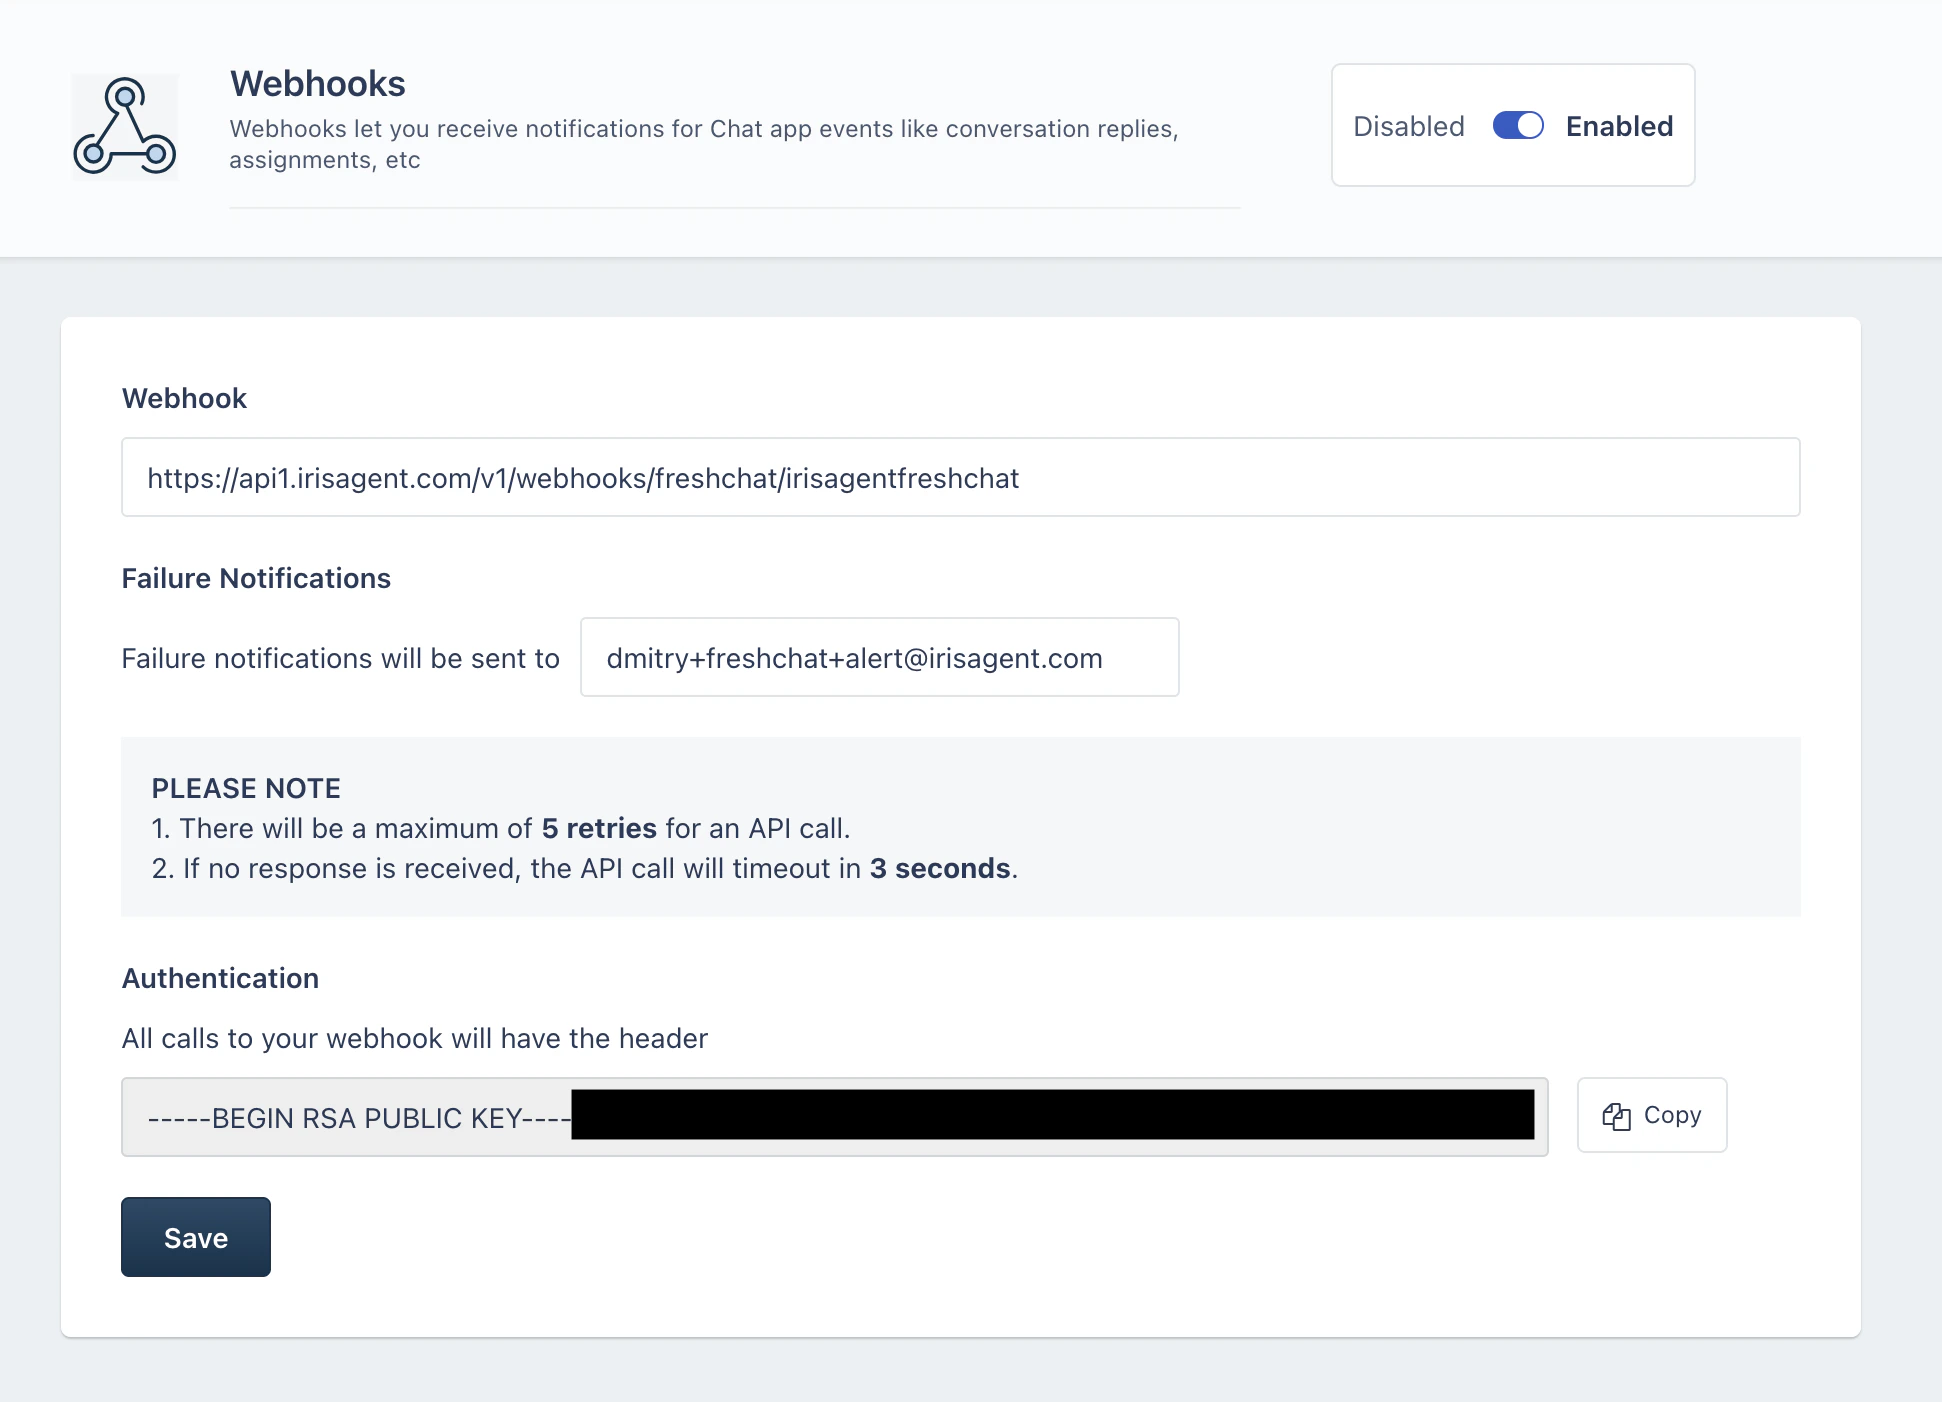
Step 4: Set Up Conversation Webhook
- In Freshchat Admin Settings, locate Conversation Webhooks section
- Click Add Webhook or Configure
- Enter the following details:
- Webhook URL: Paste the webhook URL from IrisAgent configuration
- Authentication: You’ll enter the RSA Public Key in the next step
- Webhook URL: Paste the webhook URL from IrisAgent configuration
- Do not save yet - proceed to Step 5 first
Step 5: Copy and Configure Authentication Key
- Return to the IrisAgent Freshchat Configuration page
- In the Authentication Key field, you’ll find your RSA Public Key
- Copy this key
- Return to Freshchat Webhook configuration
- Paste the RSA Public Key in the Authentication field
- Click Save
- Enable the webhook
Step 6: Retrieve Freshchat API Credentials
- In Freshchat Admin Settings, locate API Settings section
- You’ll see two important values:
- Your API Key
- Your chat URL
- Copy both of these values

Step 7: Enter Freshchat Credentials in IrisAgent
- Return to the IrisAgent Freshchat Configuration page
- Enter the following values copied from Freshchat:
- Chat URL: Paste “Your chat URL” from Freshchat API Settings
- API Token: Paste “Your API Key” from Freshchat API Settings
- Click Save